Creating a craft cabinet through DIY projects has become increasingly popular among enthusiasts who want to personalize their living spaces. With the right tools, materials, and techniques, you can design a functional and stylish storage solution tailored to your specific needs. Whether you're an experienced crafter or just starting out, this comprehensive guide will walk you through every step of the process, ensuring you achieve professional results.
DIY craft cabinets are not only cost-effective but also offer endless customization possibilities. By building your own cabinet, you can choose the perfect dimensions, materials, and finishes to match your decor. This project is ideal for those looking to maximize space, organize their crafting supplies, and add a unique touch to their home.
In this article, we'll explore the ins and outs of crafting your own DIY cabinet, from planning and design to assembly and finishing touches. We'll also provide tips, tricks, and best practices to ensure your project is a success. Let's dive in and discover how to bring your vision to life!
Read also:Kiowa Gordon A Comprehensive Look At His Life Career And Impact
Table of Contents
- Introduction to Craft Cabinet DIY
- Benefits of Building a Craft Cabinet
- Planning Your DIY Craft Cabinet
- Essential Tools for Your Project
- Choosing the Right Materials
- Design Ideas for Craft Cabinets
- Step-by-Step Assembly Guide
- Adding Finishing Touches
- Maintenance Tips for Long-Lasting Results
- Conclusion and Final Thoughts
Introduction to Craft Cabinet DIY
When it comes to enhancing your home's functionality and aesthetics, a craft cabinet DIY project is an excellent choice. This versatile piece of furniture can serve as a storage solution for crafting supplies, kitchen utensils, or even as a decorative element in your living room. By crafting your own cabinet, you gain control over its design, ensuring it meets your specific requirements.
Why Choose DIY Over Ready-Made Cabinets?
DIY projects offer several advantages over purchasing ready-made cabinets. First, you can customize the size, shape, and style to fit your space perfectly. Second, you save money by avoiding retail markups. Lastly, the satisfaction of creating something with your own hands is unmatched.
With the growing trend of DIY home improvement, more people are turning to crafting their own furniture. According to a report by Statista, the global DIY market is expected to reach $622 billion by 2025, highlighting the increasing popularity of these projects.
Benefits of Building a Craft Cabinet
Building a craft cabinet brings numerous benefits, both practical and personal. Below are some of the key advantages:
- Personalization: Design your cabinet to match your unique style and needs.
- Cost-Effectiveness: Save money by purchasing raw materials and assembling the cabinet yourself.
- Space Optimization: Create a cabinet that fits perfectly into your available space.
- Quality Control: Ensure the use of high-quality materials and craftsmanship.
Planning Your DIY Craft Cabinet
Before diving into the construction phase, proper planning is essential. This involves determining the purpose of your cabinet, measuring the space, and sketching a design.
Measuring the Space
Accurate measurements are crucial for a successful project. Measure the width, height, and depth of the area where you plan to install the cabinet. Consider any obstacles, such as windows or doorways, that might affect the design.
Read also:Luciane Buchanan Rising Star In The Entertainment Industry
Sketching the Design
Once you have your measurements, sketch a rough design of your craft cabinet. Include details such as the number of shelves, doors, and any additional features you'd like to incorporate. This will serve as a blueprint for your project.
Essential Tools for Your Project
Having the right tools is vital for a smooth and efficient DIY process. Below is a list of essential tools you'll need:
- Saw: For cutting wood to size.
- Drill: For making holes and driving screws.
- Screwdriver: For tightening and loosening screws.
- Tape Measure: For precise measurements.
- Sandpaper: For smoothing rough edges.
Investing in quality tools will make the construction process easier and ensure better results. You can also rent specialized tools if needed.
Choosing the Right Materials
Selecting the appropriate materials is critical for the durability and appearance of your craft cabinet. Consider the following options:
Wood Types
Pine, oak, and birch are popular choices for DIY cabinets due to their strength and aesthetic appeal. Pine is lightweight and affordable, while oak offers a luxurious look and excellent durability.
Finishes
Choose a finish that complements your home's decor. Options include paint, stain, and varnish. Each provides a different look and level of protection for your cabinet.
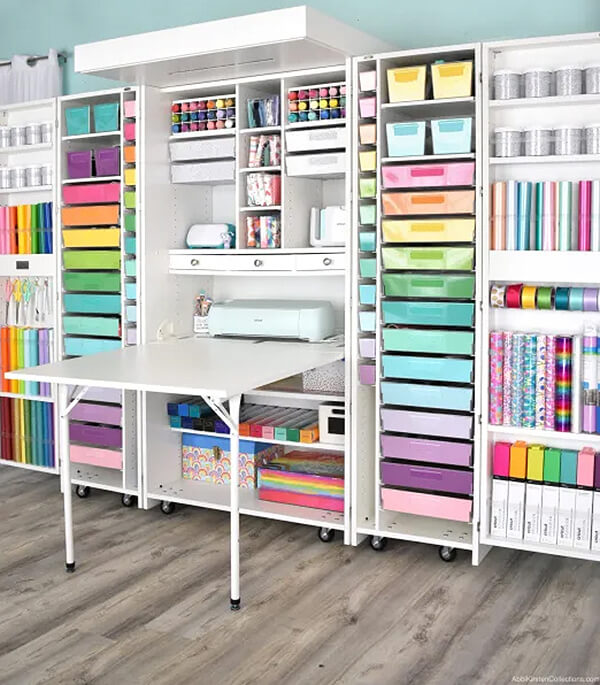
Design Ideas for Craft Cabinets
There are countless design ideas to inspire your craft cabinet project. Here are a few popular options:
Shaker Style
Characterized by its simplicity and clean lines, the Shaker style is timeless and versatile. It features recessed panel doors and minimal ornamentation.
Modern Minimalist
For a sleek and contemporary look, opt for a minimalist design with flat panel doors and hidden hinges. This style emphasizes functionality and uncluttered aesthetics.
Step-by-Step Assembly Guide
Now that you have your materials and tools ready, it's time to assemble your craft cabinet. Follow these steps for a successful build:
Step 1: Cut the Wood
Using your saw, cut the wood pieces according to your design specifications. Ensure all cuts are precise to achieve a professional finish.
Step 2: Assemble the Frame
Attach the side panels, top, and bottom pieces to form the cabinet frame. Use wood glue and screws for added stability.
Step 3: Install the Shelves
Position the shelves within the frame and secure them with brackets or screws. Ensure they are level to prevent sagging.
Step 4: Add the Doors
Attach the doors to the cabinet frame using hinges. Adjust the hinges as needed to ensure smooth operation.
Adding Finishing Touches
Once the assembly is complete, it's time to add the finishing touches that will elevate your craft cabinet's appearance.
Sanding
Sand the entire cabinet to smooth out any rough edges or surfaces. This step is crucial for achieving a polished look.
Painting or Staining
Apply your chosen finish evenly, following the manufacturer's instructions. Allow the finish to dry completely before handling the cabinet.
Maintenance Tips for Long-Lasting Results
To ensure your craft cabinet remains in excellent condition, follow these maintenance tips:
- Dust Regularly: Use a soft cloth to remove dust and debris.
- Avoid Water Exposure: Keep the cabinet away from water sources to prevent damage.
- Reapply Finish: Refresh the finish periodically to maintain its appearance.
Proper care will extend the lifespan of your DIY craft cabinet, ensuring it remains a valuable addition to your home for years to come.
Conclusion and Final Thoughts
Crafting your own DIY cabinet is a rewarding project that combines creativity, functionality, and personal satisfaction. By following the steps outlined in this guide, you can create a beautiful and practical piece of furniture tailored to your needs. Remember to plan carefully, choose quality materials, and take your time during the construction process.
We encourage you to share your experience with us in the comments section below. Did you find this guide helpful? What design ideas did you incorporate into your project? Don't forget to explore our other articles for more DIY inspiration and tips. Happy crafting!