Creating stunning artwork on canvas is an art form that many people admire. If you're looking to enhance your painting skills, learning how to paint a bow on canvas is an excellent starting point. Whether you're a beginner or an experienced artist, this guide will provide you with detailed instructions and tips to create a beautiful bow artwork. This tutorial will walk you through every step, ensuring you achieve professional results.
Painting a bow on canvas is not only fun but also therapeutic. It allows you to express creativity while learning valuable techniques that can be applied to other art projects. With the right tools, techniques, and practice, you can create artwork that reflects your personal style and flair.
In this article, we will explore the process of painting a bow on canvas in detail. You will learn about the necessary materials, step-by-step instructions, tips for achieving perfection, and much more. By the end of this guide, you'll have the confidence to create your own bow masterpiece.
Read also:Yuliya Snigir The Rising Star Of Hollywood
Table of Contents
- Materials You Need to Get Started
- Preparing Your Workspace
- Sketching the Bow Outline
- How to Paint the Bow
- Adding Details to the Ribbons
- Shading Techniques for Depth
- Finishing Touches
- Variations of Bow Styles
- Common Mistakes and How to Avoid Them
- Conclusion
Materials You Need to Get Started
Before diving into the painting process, it's essential to gather all the necessary materials. Having the right tools will make your experience smoother and more enjoyable. Below is a list of materials you'll need:
Painting Supplies
- Canvas (various sizes depending on your preference)
- Acrylic paints in various colors (red, white, black, gold, etc.)
- Paintbrushes (various sizes for details and broader strokes)
- Palette or mixing tray
- Water cup for rinsing brushes
- Paper towels for blotting brushes
These materials are widely available at art supply stores or online retailers. Investing in quality materials will enhance the final result of your artwork.
Preparing Your Workspace
Creating a comfortable and organized workspace is crucial for any art project. A well-prepared area will help you focus and avoid unnecessary distractions. Follow these steps to prepare your workspace:
Tips for Workspace Preparation
- Cover your working surface with a plastic sheet or newspaper to protect it from paint spills.
- Ensure you have adequate lighting, preferably natural light or a good desk lamp.
- Keep all your materials within reach to avoid interruptions during the painting process.
- Wear old clothes or an apron to protect your clothing from paint stains.
By setting up a conducive environment, you'll be able to fully immerse yourself in the creative process.
Sketching the Bow Outline
Once your workspace is ready, the next step is to sketch the outline of the bow on your canvas. This step is important as it serves as a guide for your painting. Follow these instructions to sketch your bow:
Steps to Sketch the Bow
- Lightly draw a horizontal line in the center of your canvas. This will serve as the base of your bow.
- Add two loops on either side of the line, ensuring they are symmetrical.
- Sketch the bow's knot in the middle, connecting the two loops.
- Draw the ribbon tails extending downward from the knot.
Remember to keep your sketch light and precise. This will make it easier to refine the details as you progress.
Read also:Best Christmas Cards A Comprehensive Guide To Finding The Perfect Holiday Greeting
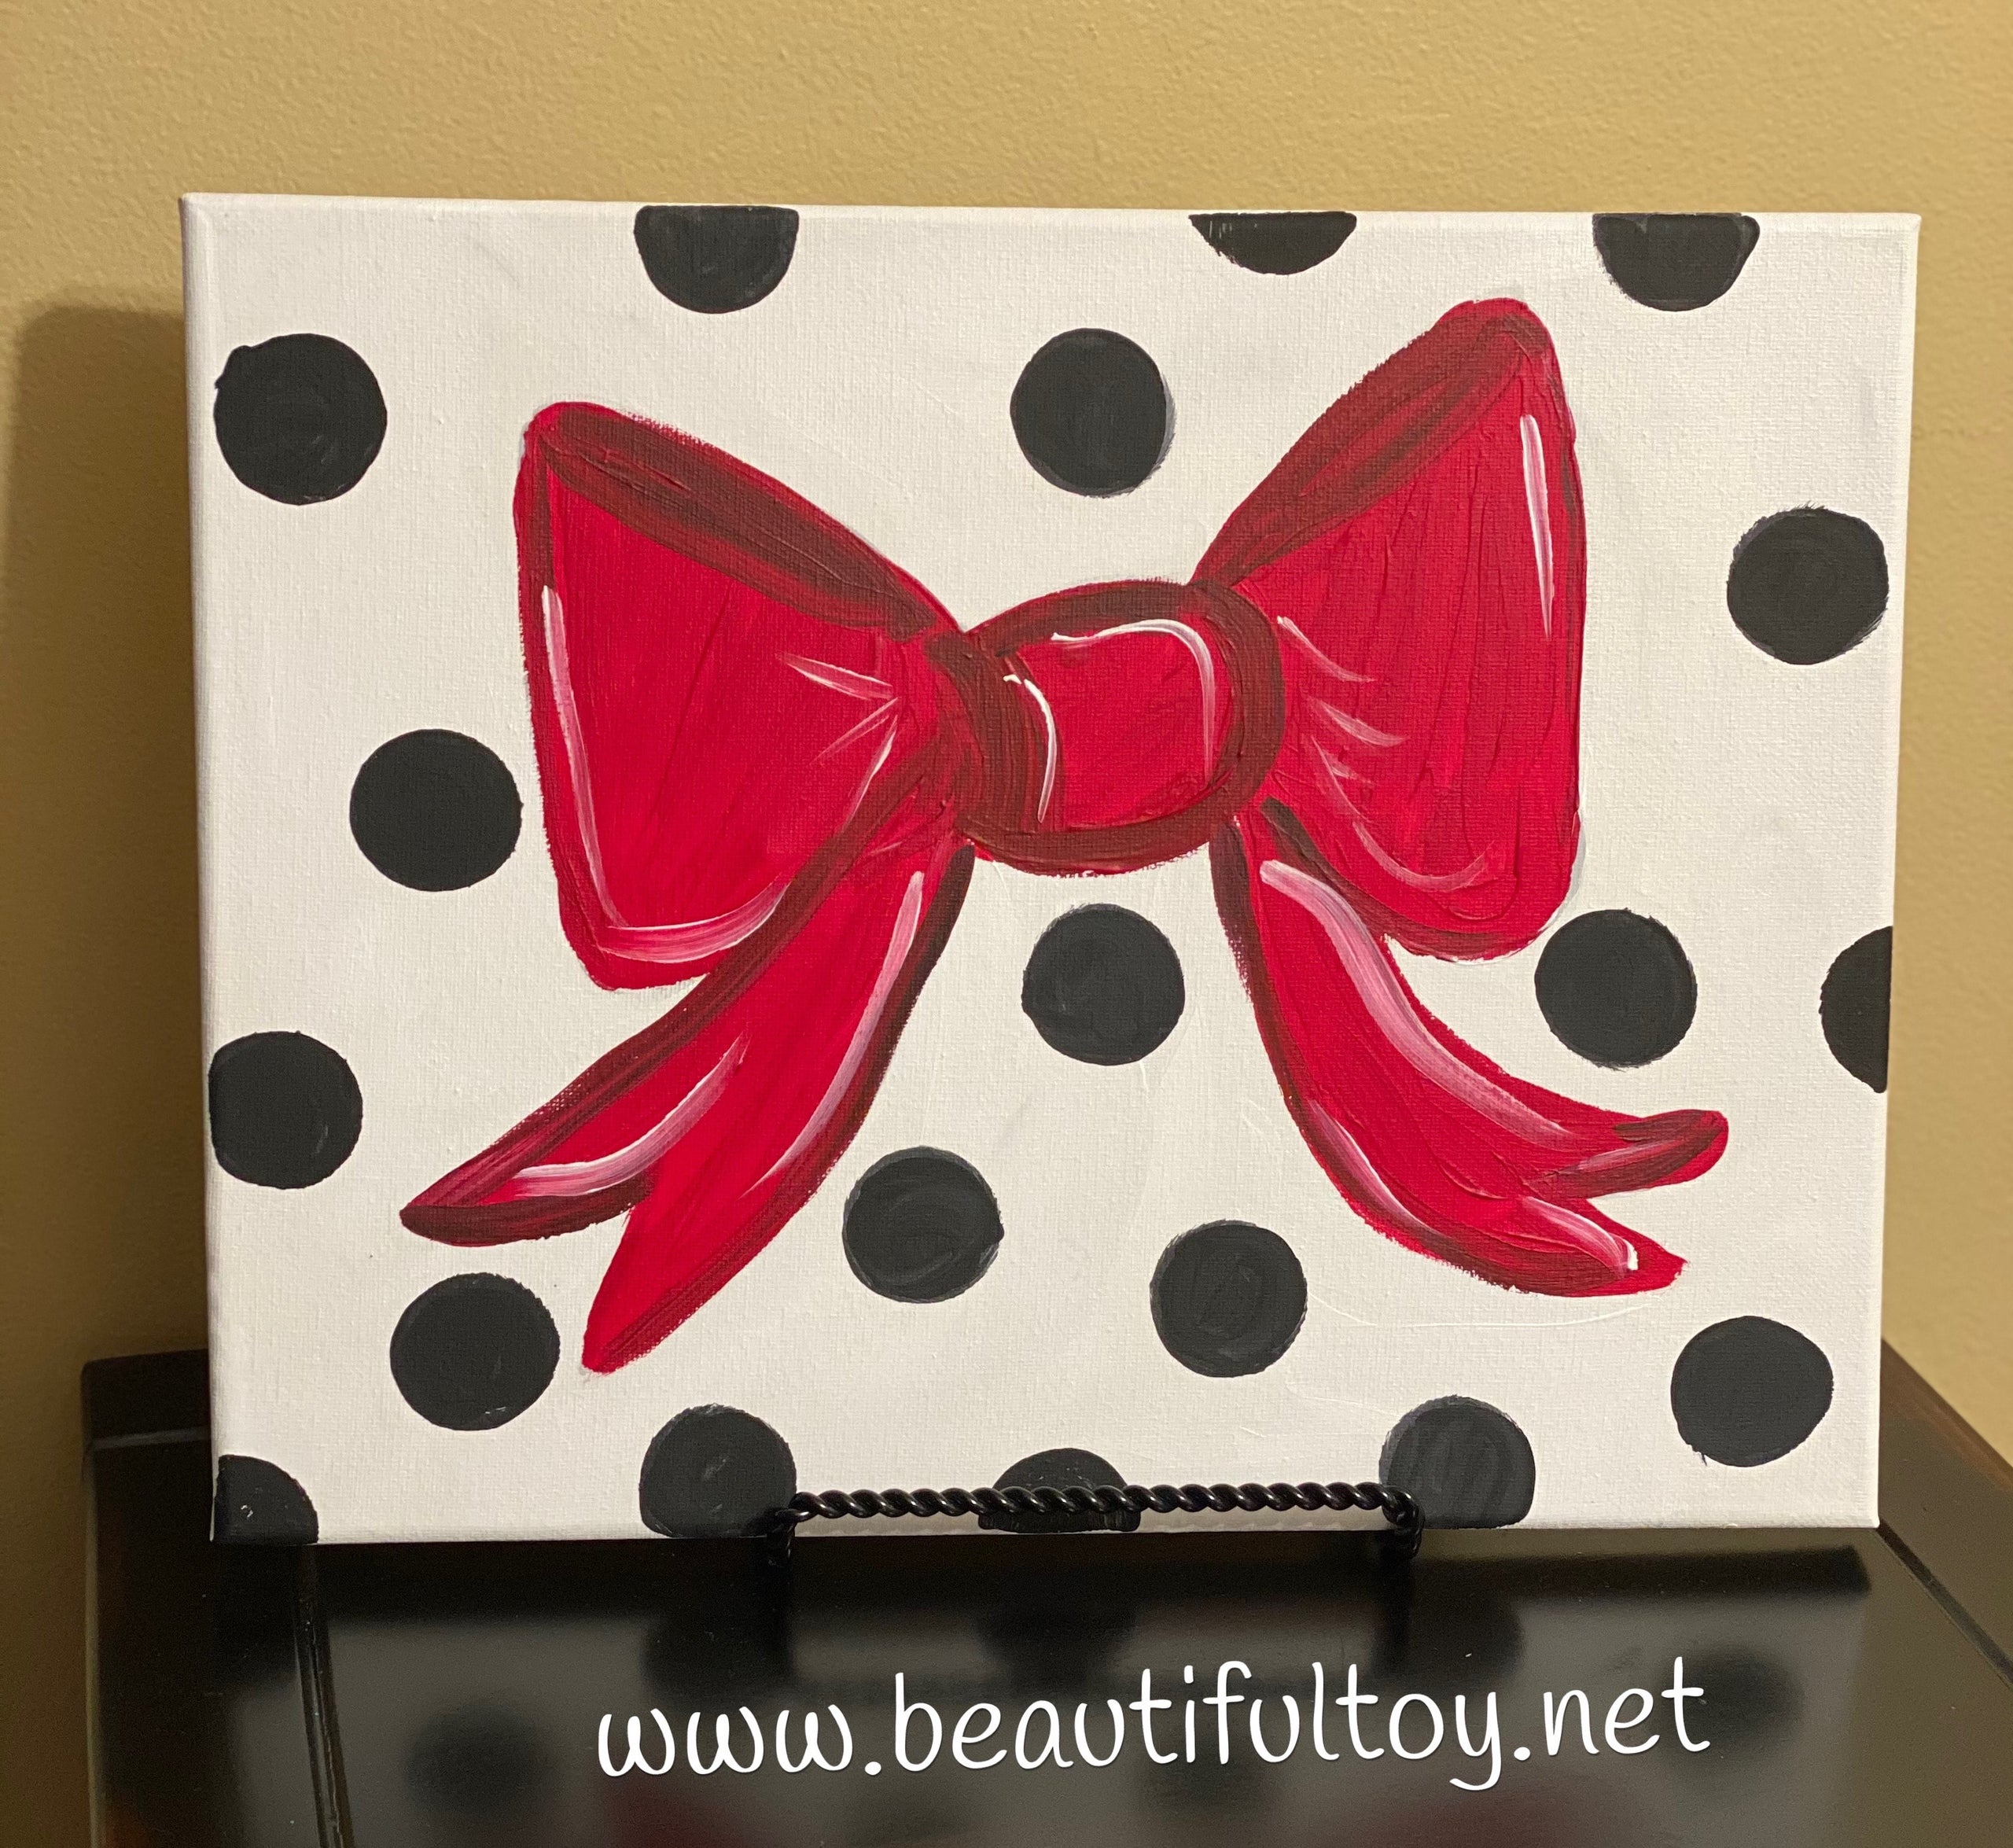
How to Paint the Bow
With the outline in place, it's time to start painting your bow. Begin by applying the base colors to the different parts of the bow. Here's how:
Base Colors Application
- Paint the loops of the bow using your primary color (e.g., red).
- Use a contrasting color for the knot and ribbon tails (e.g., black or white).
- Allow the base colors to dry completely before moving on to the next step.
Applying the base colors sets the foundation for your artwork. Ensure each section is evenly coated for a polished look.
Adding Details to the Ribbons
Once the base colors are dry, it's time to add details to the ribbons. This step involves creating texture and depth to make your bow more realistic. Follow these tips:
Creating Ribbon Texture
- Use a smaller brush to add fine lines and wrinkles to the ribbon tails.
- Apply highlights with a lighter shade of your primary color to simulate light reflection.
- Use a darker shade to create shadows, enhancing the three-dimensional effect.
Adding these details will bring your bow to life and make it appear more dynamic and realistic.
Shading Techniques for Depth
Shading is an essential technique for creating depth and dimension in your artwork. By applying shading effectively, you can make your bow look more lifelike. Here's how:
Shading Tips
- Start with a light layer of shading, gradually building up intensity.
- Focus on areas where shadows naturally occur, such as beneath the loops and around the knot.
- Blend the shading smoothly to avoid harsh lines.
Mastering shading techniques will elevate your painting skills and produce professional-quality results.
Finishing Touches
After completing the main elements of your bow, it's time to add the finishing touches. These details will enhance the overall appearance of your artwork. Consider the following:
Final Details
- Apply a glossy varnish to protect your painting and give it a polished finish.
- Add decorative elements, such as glitter or metallic accents, if desired.
- Sign your artwork to personalize it and make it uniquely yours.
Taking the time to add finishing touches will ensure your bow painting is both beautiful and memorable.
Variations of Bow Styles
While the classic bow is timeless, exploring different bow styles can add variety to your artwork. Here are a few variations to consider:
Different Bow Styles
- Ribbon Bow: A simple and elegant design using ribbon-like textures.
- Christmas Bow: Incorporate festive colors and elements for a holiday-themed bow.
- Floral Bow: Add flowers or leaves to create a more intricate and decorative bow.
Experimenting with various styles allows you to express your creativity and discover new techniques.
Common Mistakes and How to Avoid Them
Even the most experienced artists encounter challenges when painting. Here are some common mistakes and tips to avoid them:
Mistakes to Avoid
- Overmixing Colors: Stick to a limited palette to maintain color consistency.
- Ignoring Proportions: Ensure all elements of the bow are proportionate to each other.
- Rushing the Process: Take your time to achieve the desired level of detail and quality.
By being aware of these potential pitfalls, you can create a flawless bow painting.
Conclusion
Painting a bow on canvas is a rewarding and enjoyable experience. By following this step-by-step guide, you can create stunning artwork that reflects your personal style and creativity. Remember to gather the necessary materials, prepare your workspace, and practice patience and precision throughout the process.
We encourage you to share your finished artwork with friends and family or on social media. Your feedback and comments are valuable to us, so feel free to leave a comment below. If you enjoyed this tutorial, explore other articles on our website for more art inspiration and tips.
Happy painting!